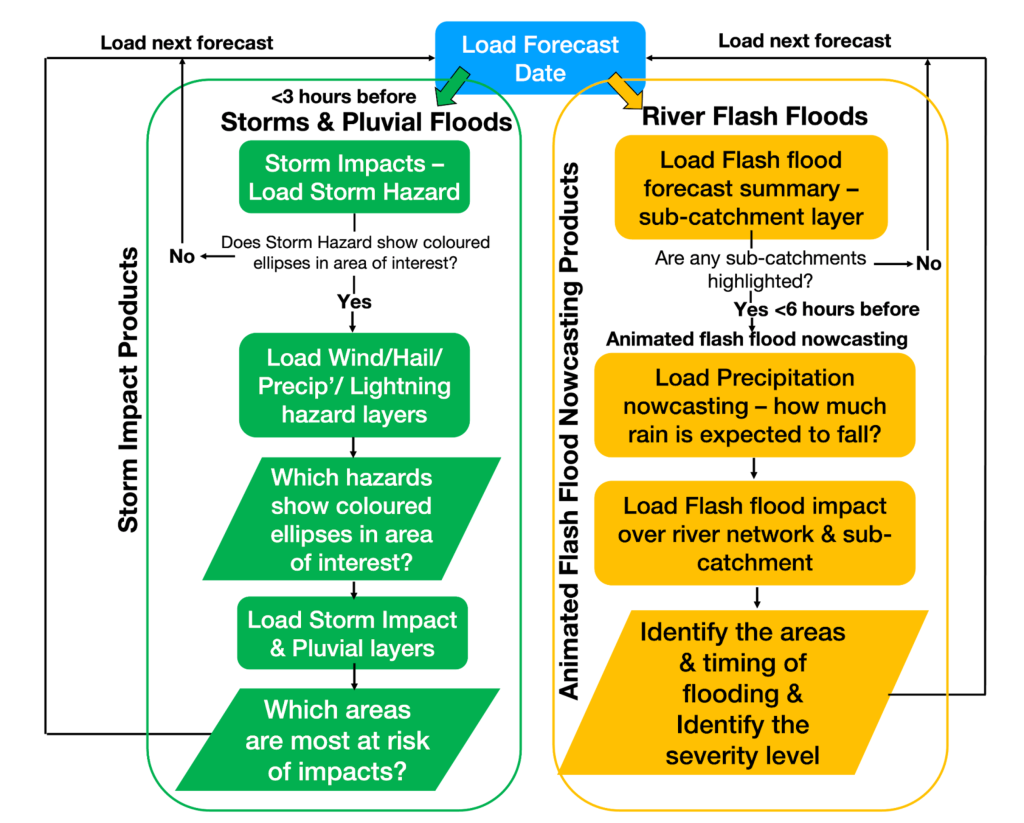
This workflow outlines the steps for analysing Storms and Pluvial Floods (indicated in green), and Riverine Flash Flood events (indicated in yellow) using the EDERA ‘Storm Impact’ and ‘Animated Flash Flood Nowcasting’ products.
Schematic of the workflow to use EDERA Products during the analysis of an event.
Workflow for using EDERA Products
1. Select Forecast Date, Time, and Area of Interest
Use the drop-down menu above the animation slider to select the desired date and time. All forecast times are displayed in UTC. Once selected, click “Apply”.
If no EDERA layers are loaded, the default date will align with the one displayed in red at the top-right corner. You can change this by using the date selection box.
2. Review Summary Layers to Identify Potential Events
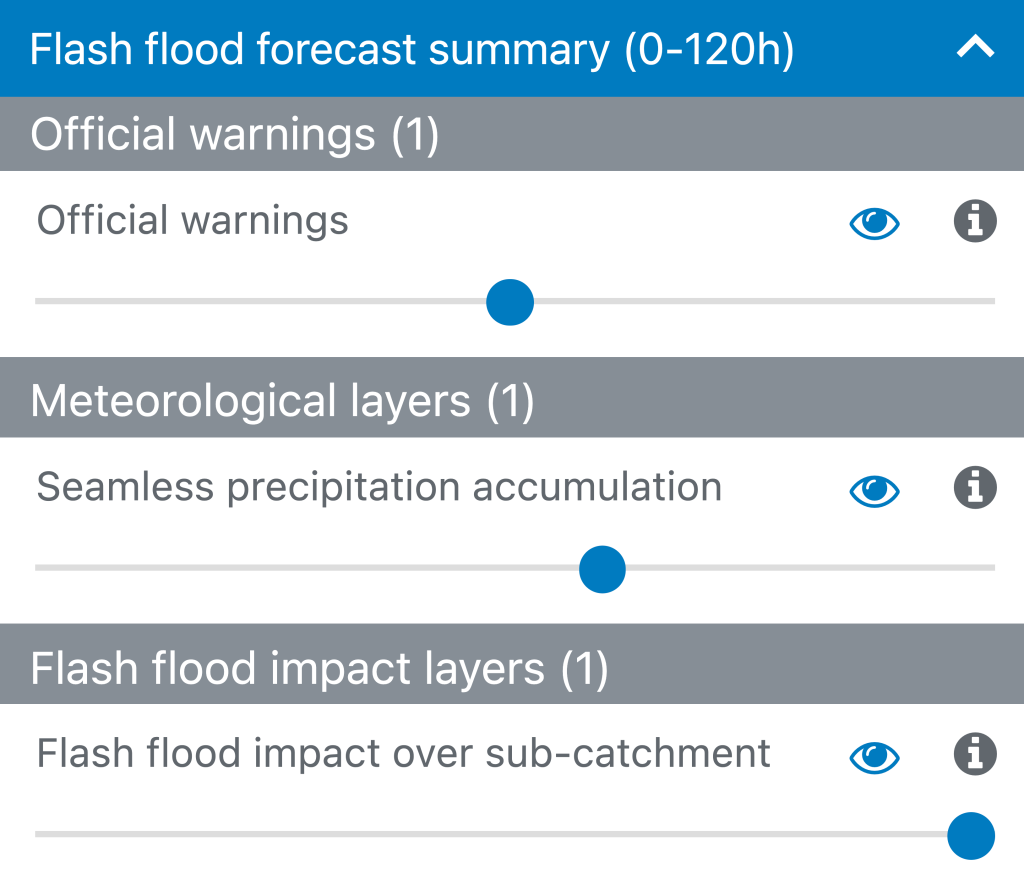
Begin by examining the ‘Flash Flood Forecast Summary (0-120h)’ layers block. Products here show if a flash flood is forecasted in different time steps over the next 5 days.
Official Warnings Layer:
Check for areas within your region of interest that are under moderate (yellow), severe (orange), or extreme (red) warnings issued by the national hydro-meteorological authority.
Seamless Precipitation Accumulation Layer:
This layer forecasts accumulated precipitation over the next 0-6, 7-24, 25-48 and 49-120 hours, helping you identify areas potentially impacted by heavy rainfall.
Flash Flood Impact Over Sub-Catchment Layer:
Determine whether any sub-catchments in your area of interest are at risk of flash flooding within the next 0-6, 7-24, 25-48 and 49-120 hours. Zoom in on highlighted sub-catchments to check for a flood signal.
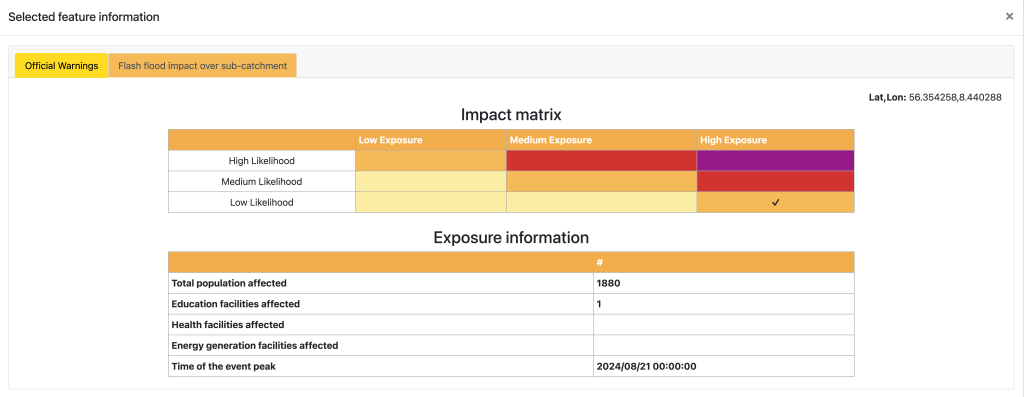
Click on each sub-catchment to bring up a pop-out window (see 3rd image below) which gives the time of the event peak.
If no signal is detected, no further action is needed.
If a signal is detected within 0-6 hours lead time, proceed to the next steps.
Flash flood forecast summary (0-120h) layers.
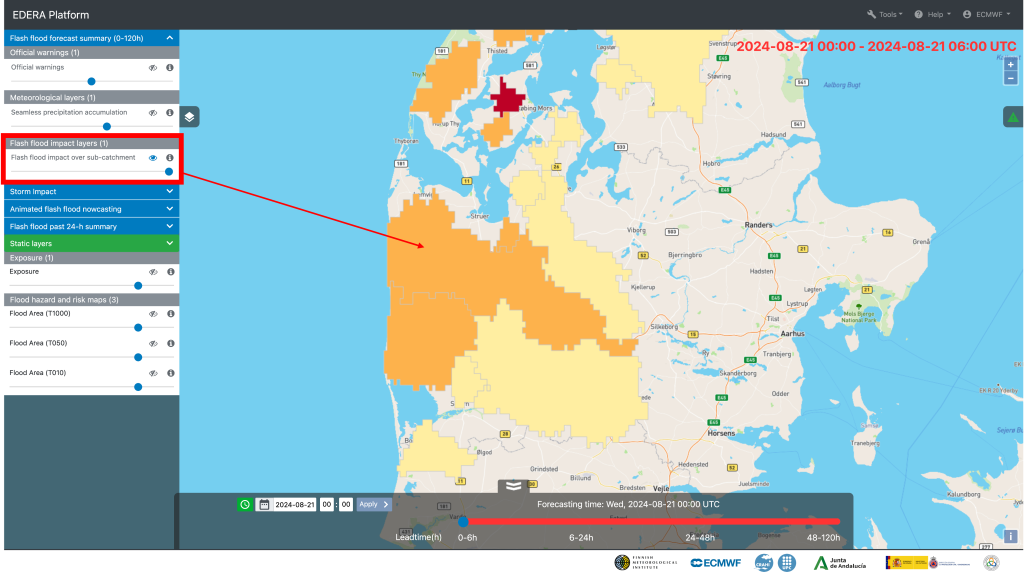
Example of Flash Flood Impact Over the Sub-Catchment layer.
Impact matrix and Exposure Information are displayed in the pop-up window when a feature is selected on the map.
3. Identify Areas at Risk
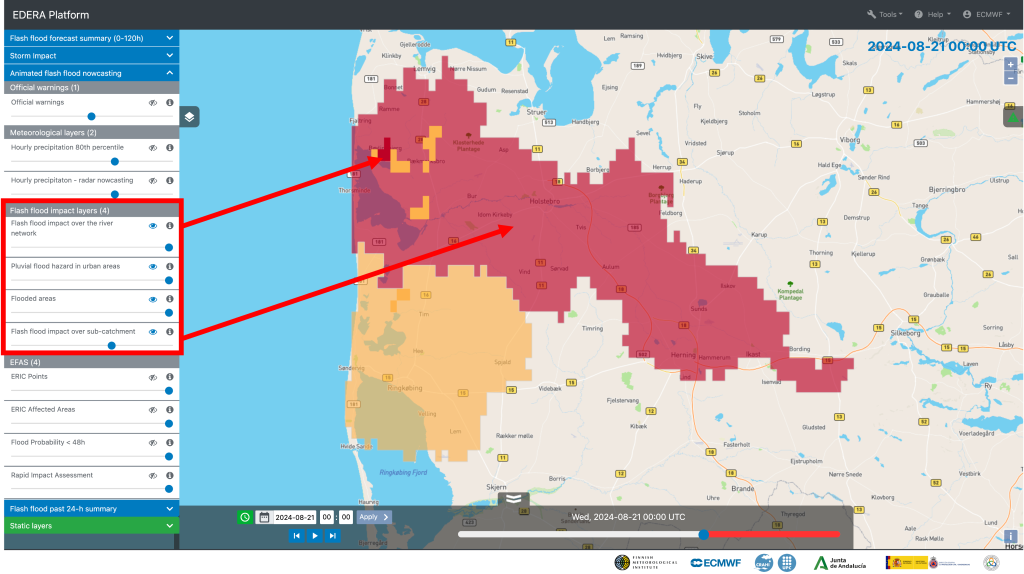
If flash flooding is expected within the next 6 hours, select the Animated flash flood nowcasting block. Within this block, use the Flash Flood Impact layers to pinpoint sub-catchments and river network areas that may be at risk of flash flooding. Zoom in on these highlighted areas for a closer look.
4. Analyse Hourly Impact Forecasts
Use the animation slider to move forward in time and observe the forecast’s evolution for specific 1 arcminute (~1.4 km) grid cells where flash flooding may occur. Forecasts are only available for the first 6 hours.
Enhance visibility by displaying the impact forecasts layer over the catchment summary layer in the legend window. Adjust the opacity if necessary.
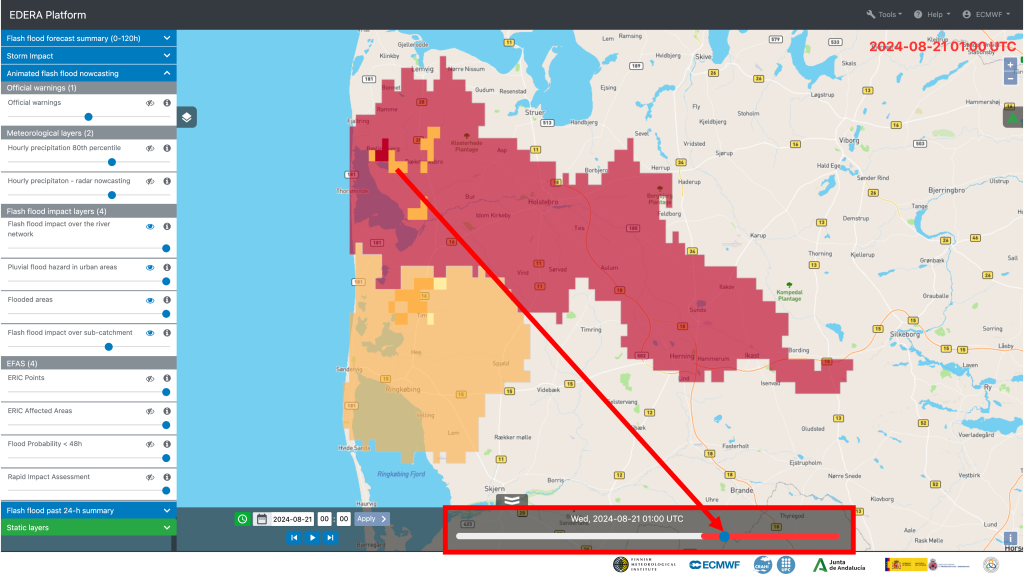
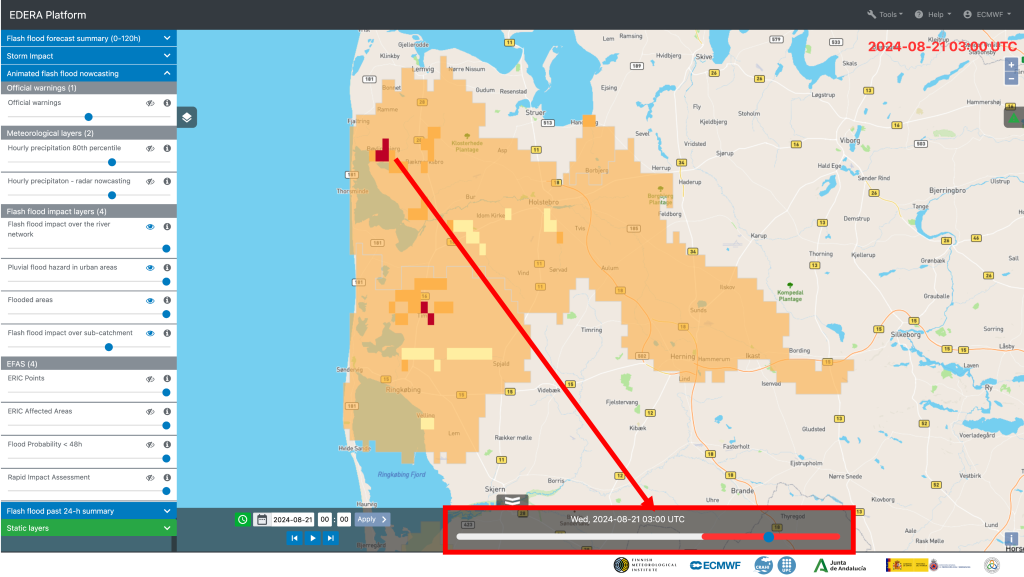
Example: At 01:00 UTC (image above), the forecast indicates a high impact level for the sub-catchment and some river network pixels shown in orange and red. As you progress through the forecast using the slider, observe that the impact weakens to a medium level for the selected sub-catchment by 03:00 UTC (image below).
5. Check Exposure Map
Toggle the ‘Exposure’ data layer in the Static Block to assess the combined relative exposure of populations, health and education facilities, and energy and transport infrastructure in your area of interest.
The exposure layer indicates whether an area is exposed to low, medium, or high levels of threat from potential flood damage.